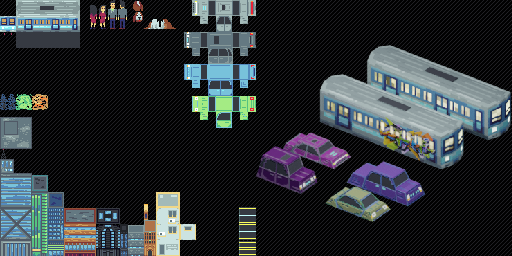
The image above shows the full tile map on the left, which includes the building textures on the bottom left, cars on the top right, roads on the bottom right, train carriages on the top left, the pixel couple and St Bernard on the top, and foliage on the left. On the right are isometric renders of the 4 types of vehicle and the two train carriages. Notice how the colours are different? On top of the tile map, there are other maps used for building the material shader:
- The main tile map above is used for colour and alpha (total transparency, not transmission/physically accurate transparency)
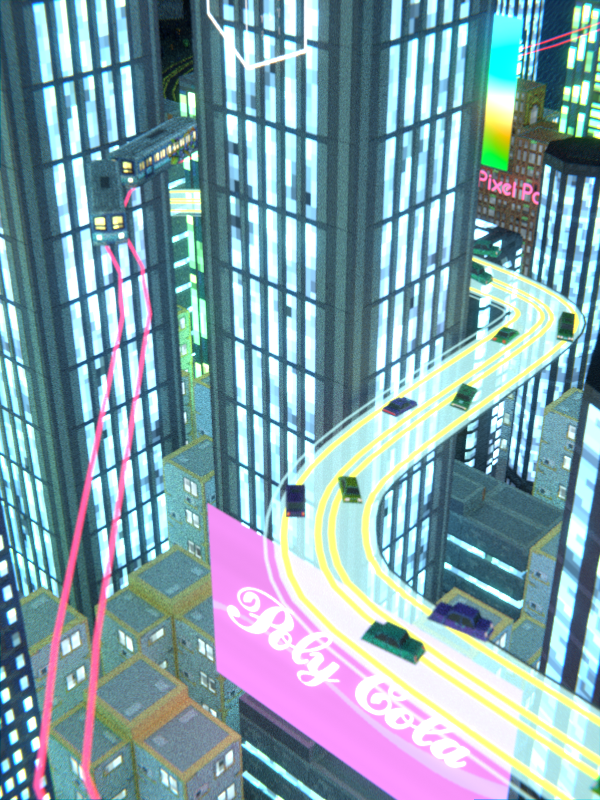
- Luminosity map, this is white where something is luminous, and black otherwise. The colour map is still used for the colours of the light. The luminosity map just masks the emission shader and multiplies it by a value to increase the luminosity beyond 1. In addition, I mixed the luminosity map in the shader with pixelated noise. This gave the impression of variety in lights being switched on and off in all the city windows.
- Bump map, to add additional detail, there is a bump added on top, which Blender can dynamically transform into a normal map. A quick way to do this is just using the grayscale image of the regular colour map. But for better results, it’s best to paint over things in black that you want to recede (e.g. windows) and paint over in white of things you want to stick out (e.g. the extenal air conditioners on the small buildings).
- Colour mask. Blender has a node for particles that generates a random number per particle. As the cars are particles (that are then moved on a path via a force field effector), I can make cars random colours dynamically, without retexturing. They way to do this is by painting over in white all the sections to be recoloured (i.e. the cars’ bodies), and leaving black everything else . This colour mask then becomes the factor in the mixRGB node that then feeds into the final shader. Into the mixRGB node, one is the ordinary colour map, and the other is a HSV node. By feeding the random output of the Particle Info node into the hue of the HSV node, Blender can generate a random colour per particle which is then used to paint the cars.